Securing a Website Using Firebase, Angular 8, and ASP.Net Core 3.1
Introduction
One of the most timely and repetitive tasks that you must endure when starting a web project is the creation of an authentication system. This includes a data store for storing the user information, a mechanism for the creation and logging in of the users, a management system for the user accounts , and visual elements(create user form, login form, logout link, etc) that allow the user a means to interface with you application. Luckily for us, there are many options of services that are able to shorten the time we spend doing this process by taking care of some of the steps for us.
Firebase
Firebase is a platform that offers a multitude of cloud-based developer services. The service that we will be implementing and incorporating in our application is the Firebase Auth. Firebase Auth is a multi-platform authentication service that offers feature such as user creation and storage, various registration mechanisms, and gives us easy libraries to add social media platform authentication to our systems.
The Plan
what we will make in this article will be:
- We will create an ASP.Net Core Web API project
- We will use the Firebase server side library to initialize the authentication and authorization middleware of our web application by using the JWT(JSON-Web_Token) bearer token created from the Firebase system.
- We will protect a web api controller method using the provided authorization attribute
- We will create an Angular client application for our “front-end”
- We will create an authorization service in our angular app, that will use the Firebase system as it’s authorization mechanism.
- We will create a method that use the Google social media authentication provider to let our users sign in.
- We will create protected routes and an angular interceptor class to make secure rest calls to our protected controller method.
- We will create a simple UI.
What you will need
- .Net Core 3.1(I am sure that the 3,0 version will probably work as well.)
- Node Package Manager – Npm(my current version is 6.13)
- A code editor(I use Visual Studio 2019 community version)
Create the web application
To create the web application we will open a command prompt:
Create the solution and web api project and discard unneeded code classes.
dotnet new sln --name FirebaseAndAngular
dotnet new webapi --name FirebaseAndAngular.Web --output .
dotnet sln add .\FirebaseAndAngular.Web.csproj
rm .\WeatherForecaset.cs
rm .\Controllers\WeatherForecastController.cs
dotnet restore .\FirebaseAndAngular.sln
Add the needed packages for the web application
dotnet add package FirebaseAdmin
dotnet add package Microsoft.AspNetCore.Authentication.JwtBearer
dotnet add package Microsoft.AspNetCore.SpaServices
dotnet add package Microsoft.AspNetCore.SpaServices.Extensions
Startup.cs
Update the startup.cs
 public class Startup
    {
        public Startup(IConfiguration configuration,IWebHostEnvironment env)
        {
            Configuration = configuration;
            HostingEnvironment = env;
        }

        public IConfiguration Configuration { get; }
        public IWebHostEnvironment HostingEnvironment { get; set; }
        // This method gets called by the runtime. Use this method to add services to the container.
        public void ConfigureServices(IServiceCollection services)
        {
            services.AddSpaStaticFiles(config =>
            {
                config.RootPath = "wwwroot";
            });

            services.AddControllers();

            var pathToKey = Path.Combine(Directory.GetCurrentDirectory(), "keys", "firebase_admin_sdk.json");

            if (HostingEnvironment.IsEnvironment("local"))
                pathToKey = Path.Combine(Directory.GetCurrentDirectory(), "keys", "firebase_admin_sdk.local.json");

            FirebaseApp.Create(new AppOptions
            {
                Credential = GoogleCredential.FromFile(pathToKey)
            });

            services.AddAuthentication(JwtBearerDefaults.AuthenticationScheme)
                .AddJwtBearer(options =>
                {
                    var firebaseProjectName = Configuration["FirebaseProjectName"];
                    options.Authority = "https://securetoken.google.com/" + firebaseProjectName;
                    options.TokenValidationParameters = new TokenValidationParameters
                    {
                        ValidateIssuer = true,
                        ValidIssuer = "https://securetoken.google.com/" + firebaseProjectName,
                        ValidateAudience = true,
                        ValidAudience = firebaseProjectName,
                        ValidateLifetime = true
                    };
                });
        }

        // This method gets called by the runtime. Use this method to configure the HTTP request pipeline.
        public void Configure(IApplicationBuilder app, IWebHostEnvironment env)
        {
            if (env.IsDevelopment())
            {
                app.UseDeveloperExceptionPage();
            }

            app.UseStaticFiles();
            app.UseSpaStaticFiles();
            app.UseHttpsRedirection();

            app.UseRouting();

            app.UseAuthentication();
            app.UseAuthorization();

            app.UseEndpoints(endpoints =>
            {
                endpoints.MapControllers();
            });
            app.UseSpa(spa =>
            {
                spa.Options.SourcePath = "client-app";
                if (env.IsDevelopment() || env.IsEnvironment("local"))
                {
                    var startScript = env.IsEnvironment("local") ? "start-local" : "start";
                    spa.UseAngularCliServer(npmScript: startScript);
                }

            });
        }
    }
Let’s take a look and see what the code is doing
 services.AddSpaStaticFiles(config =>
            {
                config.RootPath = "wwwroot";
            });
This block registers the SPA(single page application) static files provider, This gives us a means to serve a single page application such as an angular site. The RootPath property is where we are going to have our compiled angular app served from.
FirebaseApp.Create(new AppOptions
            {
                Credential = GoogleCredential.FromFile(pathToKey)
            });
This code instantiates the Firebase App instance. This instance will be used by the application to make calls to the firebase services. The GoogleCrendential.FromFile function creates the credentials for the Firebase SDK from a file. Later in the application I will show you how to retrieve these values from your Firebase administration dashboard.
 services.AddAuthentication(JwtBearerDefaults.AuthenticationScheme)
                .AddJwtBearer(options =>
                {
                    var firebaseProjectName = Configuration["FirebaseProjectName"];
                    options.Authority = "https://securetoken.google.com/" + firebaseProjectName;
                    options.TokenValidationParameters = new TokenValidationParameters
                    {
                        ValidateIssuer = true,
                        ValidIssuer = "https://securetoken.google.com/" + firebaseProjectName,
                        ValidateAudience = true,
                        ValidAudience = firebaseProjectName,
                        ValidateLifetime = true
                    };
                });
This block of code initiates the authentication service in our application. the will allow use to utilize the framework’s authentication and authorization middleware. Our authentication mechanism will use JWTs. We set these properties inside the AddJwtBearer function. I will show you where to retrieve the name of your Firebase project when we review the creation of a Firebase project later in the article.
public void Configure(IApplicationBuilder app, IWebHostEnvironment env)
        {
            if (env.IsDevelopment())
            {
                app.UseDeveloperExceptionPage();
            }

            app.UseStaticFiles();
            app.UseSpaStaticFiles();
            app.UseHttpsRedirection();

            app.UseRouting();

            app.UseAuthentication();
            app.UseAuthorization();

            app.UseEndpoints(endpoints =>
            {
                endpoints.MapControllers();
            });
            app.UseSpa(spa =>
            {
                spa.Options.SourcePath = "client-app";
                if (env.IsDevelopment() || env.IsEnvironment("local"))
                {
                    var startScript = env.IsEnvironment("local") ? "start-local" : "start";
                    spa.UseAngularCliServer(npmScript: startScript);
                }

            });
        }
In the Configure method of the Startup class pay attention to the order of the middleware. We have added the app.UseAuthentication to ensure that calls made to the API utilize our authentication service when appropriate. The UseSpaStaticFiles and UseSpa methods are middleware that will help to serve our angular app correctly. It even contains a portion that will command the angular cli server to do live client side updates as we debug our application.
Userscontroller.cs
This controller holds the endpoints that will be called from our client application.
[...]
namespace FirebaseAndAngular.Web.Controllers
{
    [Route("api/[controller]")]
    [ApiController]
    public class UsersController : ControllerBase
    {
        [HttpPost("verify")]
        public async Task<IActionResult> VerifyToken(TokenVerifyRequest request)
        {
            var auth = FirebaseAdmin.Auth.FirebaseAuth.DefaultInstance;

            try
            {
                var response = await auth.VerifyIdTokenAsync(request.Token);
                if (response != null)
                    return Accepted();
            }
            catch (FirebaseException ex)
            {
                return BadRequest();
            }

            return BadRequest();
        }

        [HttpGet("secrets")]
        [Authorize]
        public IEnumerable<string> GetSecrets()
        {
            return new List<string>()
            {
                "This is from the secret controller",
                "Seeing this means you are authenticated",
                "You have logged in using your google account from firebase",
                "Have a nice day!!"
            };
        }
    }
}
Let’s take a closer look
[HttpPost("verify")]
        public async Task<IActionResult> VerifyToken(TokenVerifyRequest request)
        {
            var auth = FirebaseAdmin.Auth.FirebaseAuth.DefaultInstance;

            try
            {
                var response = await auth.VerifyIdTokenAsync(request.Token);
                if (response != null)
                    return Accepted();
            }
            catch (FirebaseException ex)
            {
                return BadRequest();
            }

            return BadRequest();
        }
The verify endpoint is what we will call after the user is authenticated on the client. We will take the retrieved token from the Firebase user and verify it from the server. For our current situation not totally needed, but this is an excellent place to pass in other information that you retrieve from the Firebase user object. Especially if you want to use social auth providers for authentication but store the user record to your own data-store. Here we get the default instance of a Firebase Auth object(The one we initialized in our startup class). We then call a method to verify the token against Firebase to check if we have a legitimate user that authenticated themselves in our application.
[HttpGet("secrets")]
        [Authorize]
        public IEnumerable<string> GetSecrets()
        {
            return new List<string>()
            {
                "This is from the secret controller",
                "Seeing this means you are authenticated",
                "You have logged in using your google account from firebase",
                "Have a nice day!!"
            };
        }
The secrets endpoint of this controller is a simple method that will return a collection of strings. We have added the Authorize attibute to protect this endpoint using our authentication service. Since we are using the JWT auth mechanism we will make our client app add the Bearer token retrieved and verified by Firebase to our authrization header of our HTTP requests. Any calls made without or with a bad token will recieve a 403 forbidden error.
The Angular Application
Let’s go back to the command prompt to start our angular application. Start in the directory where your .csproj file is located. First, let’s get the angular CLI tools
npm install -g angular/clilet’s create the angular application. Say yes to the routing option if asked.
ng new client-app
Create the folder for the application’s output. This is the folder that we setup as our SPA root folder in our startup class in the web api project
mkdir wwwrootGo into the Angular app’s directory
cd client-app
We’re going to create some needed components, classes, and services
ng generate component home
ng generate component login
ng generate component secret
ng g class models/currentUser
ng g guard security/authGuard
Install the package needed for the Firebase library. this package is call AngularFire. It is the official Angular library for Firebase. You can check it out here.
npm install firebase @angular/fire --saveGreat. Now let’s look at some of the code.
Angular.json
[...]
        "build": {
          "builder": "@angular-devkit/build-angular:browser",
          "options": {
            "outputPath": "wwwroot",
            "index": "src/index.html",

[...]
Let’s pay attention to what we have to change here. In this file we must set the property outputPath to the value “wwwroot”. This will tell angular that when it builds the application to deposit the output files in our wwwroot folder which will allow our dotnet core web application to host the SPA correctly.
app.module.ts
import { BrowserModule } from '@angular/platform-browser';
import { NgModule } from '@angular/core';

import { AppRoutingModule } from './app-routing.module';
import { AppComponent } from './app.component';
import { HomeComponent } from './home/home.component';
import { LoginComponent } from './login/login.component';
import { SecretComponent } from './secret/secret.component';
import { AngularFireModule } from '@angular/fire';
import { AngularFireAuthModule } from '@angular/fire/auth';
import { environment } from '../environments/environment';
import { AuthGuardGuard } from './security/auth-guard.guard';
import { HttpClientModule, HTTP_INTERCEPTORS } from '@angular/common/http';
import { AuthInterceptor } from './security/auth-interceptor';

@NgModule({
  declarations: [
    AppComponent,
    HomeComponent,
    LoginComponent,
    SecretComponent
  ],
  imports: [
    BrowserModule,
    AppRoutingModule,
    AngularFireModule.initializeApp(environment.firebaseConfig),
    AngularFireAuthModule,
    HttpClientModule
  ],
  providers: [
    AuthGuardGuard,
    { provide: HTTP_INTERCEPTORS, useClass: AuthInterceptor, multi: true }
  ],
  bootstrap: [AppComponent]
})
export class AppModule { }
The important things to pay attention to here are our addition of setting our AuthInterceptor class as our HTTP interceptor. Also this section:
[...]
AngularFireModule.initializeApp(environment.firebaseConfig),
    [...]
This line is initializing the AngularFire module with an object from our environment class, which we will take a look at now:
environment.ts
export const environment = {
  production: false,
  firebaseConfig : {
    apiKey: "",
    authDomain: "",
    databaseURL: "",
    projectId: "",
    storageBucket: "",
    messagingSenderId: "",
    appId: ""
  }
};
In the environment class we have made a firebaseConfig property. This object is a config object needed to initialize the AngularFire module. For now we have placeholders for the values we will retrieve from our Firebase project.
app-routing.module.ts
[...]
const routes: Routes = [
  { path: '', component: HomeComponent },
  { path: 'login', component: LoginComponent },
  { path: 'secret', component: SecretComponent, canActivate: [AuthGuardGuard] },
  { path: '**', component: HomeComponent }
];
[...]
This section from the routing module file is where we have placed our angular routes. Each route is defined with a component that will be utilized when the route activated. Pay attention to the secret route. This is our protected route of our application. To do the work of determining if a user can visit we have provided our guard class AuthGuardGuard(I know, another bad name).
auth-service.service.ts
This class is where most of the heave lifting occurs. We’ll look at each function separately and talk about what’s going on
  [...]
  user$: BehaviorSubject<CurrentUser> = new BehaviorSubject<CurrentUser>(new CurrentUser());

  constructor(private angularAuth: AngularFireAuth, private httpclient: HttpClient) {
    this.angularAuth.authState.subscribe((firebaseUser) => {
      this.configureAuthState(firebaseUser);
    });
  }
[...]
the class starts by having a BehaviorSubject named user$. This subject will fire off whenever the state of the current user is changed. In the constructor we subscribe this service to the Observable authState property of the angularAuth object. Whenever the user is successfully logged in or logged out the value of this is sent to the configureAuth state function:
configureAuthState(firebaseUser: firebase.User): void {
    if (firebaseUser) {
      firebaseUser.getIdToken().then((theToken) => {
        console.log('we have a token');
        this.httpclient.post('/api/users/verify', { token: theToken }).subscribe({
          next: () => {
            let theUser = new CurrentUser();
            theUser.displayName = firebaseUser.displayName;
            theUser.email = firebaseUser.email;
            theUser.isSignedIn = true;
            localStorage.setItem("jwt", theToken);
            this.user$.next(theUser);
          },
          error: (err) => {
            console.log('inside the error from server', err);
            this.doSignedOutUser()
          }
        });
      }, (failReason) => {
          this.doSignedOutUser();
      });
    } else {
      this.doSignedOutUser();
    }
  }
This function firsts checks to see if we have a valid firebaseUser object. when the authentication is successful this object will have a value if not or when the user logs out it will be null. When success we send the token retrieved from the firebaseUser to the server to be verified. When the token is verified we then can add it to local storage to be used throughout the application. We also create our own user object from the properties returned from Firebase and then we fire the next method of our user$ subject. If there is an empty object or a failure from the server, we clear everything and make sure the user is signed out.
 doGoogleSignIn(): Promise<void> {
    var googleProvider = new firebase.auth.GoogleAuthProvider();
    googleProvider.addScope('email');
    googleProvider.addScope('profile');
    return this.angularAuth.auth.signInWithPopup(googleProvider).then((auth) => {});
  }
this function creates a GoogleAuthProvider object and then adds scope objects to let the Google inform the user of what our project will have access to after authorization. In this case, it will create a popup that will start the Google authentication process. On success it will close and focus will return to our site. At this point the angularAuth.authState observable will fire off continuing the auth process on our site.
private doSignedOutUser() {
    let theUser = new CurrentUser();
    theUser.displayName = null;
    theUser.email = null;
    theUser.isSignedIn = false;
    localStorage.removeItem("jwt");
    this.user$.next(theUser);
  }
Pretty self-explanatory. It nullifies the user’s properties and removes the token from local storage and fires off the next function on the user$ subject
logout(): Promise<void> {
    return this.angularAuth.auth.signOut();
  }

  getUserobservable(): Observable<CurrentUser> {
    return this.user$.asObservable();
  }

  getToken(): string {
    return localStorage.getItem("jwt");
  }

  getUserSecrets(): Observable<string[]> {
    return this.httpclient.get("/api/users/secrets").pipe(map((resp: string[]) => resp));
  }
These others are pretty easy. Logout signs the user out from your Firebase project. GetUserobservable retrieves the user object as an observable. This is going to come of use in the guard class. Get token retieves the JWT from local storage. this will be used by the interceptor. Finally getUsersecrets is a function that calls our protected API endpoint.
auth-guard.guard.ts
[...]
export class AuthGuardGuard implements CanActivate {
  constructor(private authservice: AuthServiceService, private router: Router) {

  }

  canActivate(
    next: ActivatedRouteSnapshot,
    state: RouterStateSnapshot): Observable<boolean> {
    return this.authservice
      .getUserobservable()
      .pipe(map(u => u != null && u.isSignedIn));
  }

}
[...]
This class protects specified routes. to determine if a user can access a route the canActivate function is used. This function will call the getUserobservable method from the auth service. If it is there and the isSignedIn property is true then the route is approved for activation and the user can visit, if not the route access will fail and end up back at the home component.
auth-interceptor.ts
[...]
  intercept(req: HttpRequest<any>, next: HttpHandler): Observable<HttpEvent<any>> {
    var token = this.authService.getToken();
    if (token) {
      var header = "Bearer " + token;
      var reqWithAuth = req.clone({ headers: req.headers.set("Authorization", header) });
      return next.handle(reqWithAuth);
    }

    return next.handle(req);
  }
The interceptor will intercept rest calls made when using the HttpModule. What we are doing here is trying to retrieve the token. If the user is logged in and has a valid token then we can add an authorization header with the JWT and make the call to the server. This is necessary when making the call to the “secrets” endpoint in our web API project. If the token isn’t present then whatever call will be made as normal with the handle function of the next parameter.
home.component.ts
[...]
export class HomeComponent implements OnInit {
  currentUser: CurrentUser = new CurrentUser();
  $authSubscription: Subscription;

  constructor(private authService: AuthServiceService, private router: Router) {
    this.$authSubscription = this.authService.user$.subscribe(u => {
      this.currentUser = u;
    });
  }
the home class is very simple.It subscribes to the user$ subject from the auth service. It uses these properties to control the values present on the template such as showing a different welcome message for signed in users than the one for un-authenticated users.
login.component.ts
[...]
 loginWithGoogle() {
    this.authService.doGoogleSignIn().then(() => {
      this.router.navigate(['']);
    });
  }
[...]
Login has the same subscription to the auth service as home does. Login also contains a call to the doGoogleSignin method of the auth service. This is fired of from a click event of a button in the template.
secret.component.ts
export class SecretComponent implements OnInit {

  secrets: string[] = [];
  constructor(private authService: AuthServiceService) { }

  ngOnInit() {
    this.authService.getUserSecrets().subscribe(secretData => { this.secrets = secretData });
  }

}
This is the component that is protected by the route guard. In it all we do is make a call to the secrets endpoint of our API. If everything worked right the interceptor should rewrite the request with a valid authorization header and we should get our data back.
Setting up the Firebase Project
That covers the code, but there are still some values in some files and configurations that you need to fill out. To get those values you need to create your Firebase project. We won’t go too deep into the process of how to do this but this should be a good starting place.
First, let’s got to the website at https://firebase.google.com
Click the Go to Console link. this will either take you to the “Welcome to Firebase” screen or prompt you to log in with your Google account.(If you don’t have one, then you will need to sign up obviously).
You will probably see a screen like this:
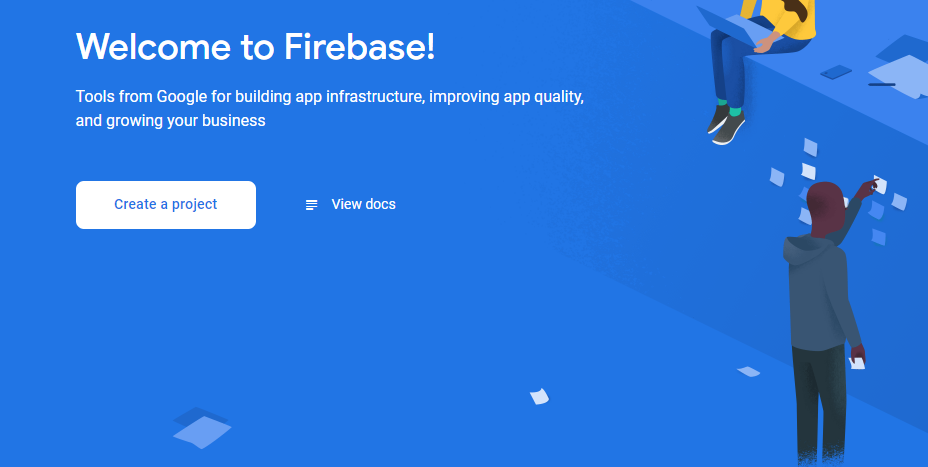
Click the Create a project button. Next you’ll be prompted for a project name:
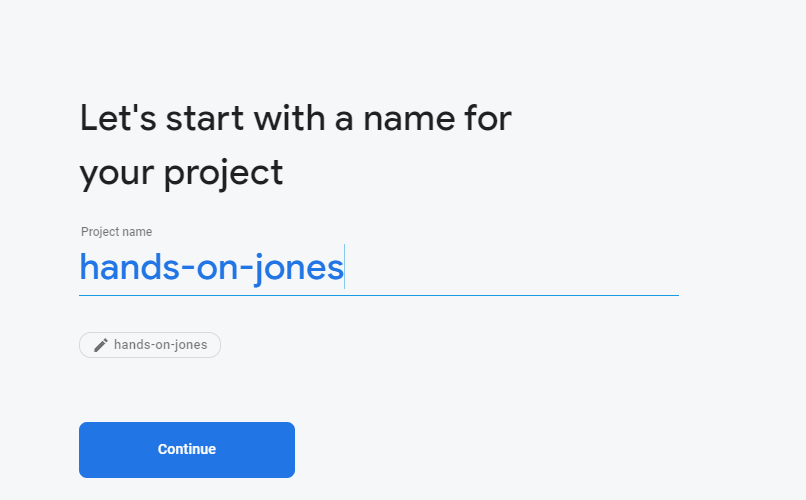
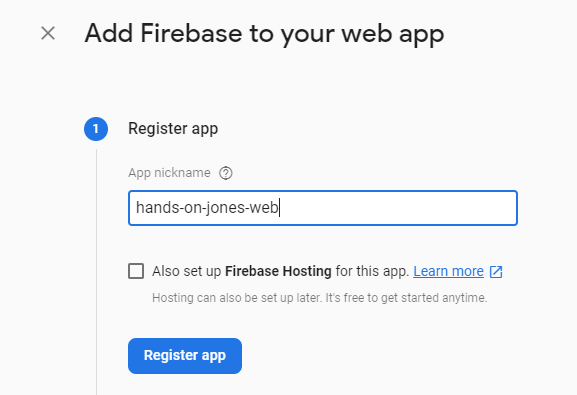
Enter one then hit Continue. Next you should create an application for your project. Hit the create new application button which should look something like:
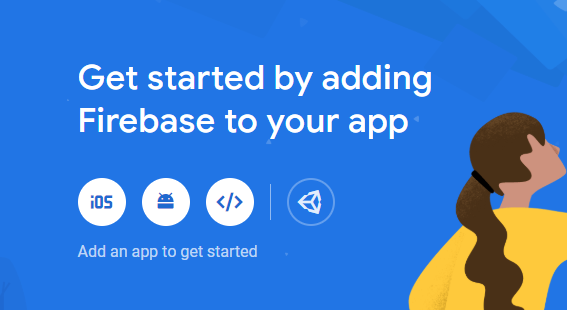
Followed by a dialog where you will name your application:
You will then be presented a dialog which will contain the config values. These values are the ones that should be plugged into the envionment.ts file. After doing this you should click the Authentication link in the left side navigation. You should see a sub menu for authentication kind of like:

click Sign-in method. Use this to enable you Google sign in method for your application.
The file that is located in the “keys” folder of the web project named “firebase_admin_sdk.json” needs to have your service account’s private key in it. So first go back to the dashboard of your Firebase project
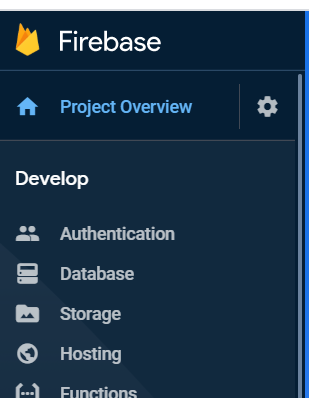
On the menu on the left side right next to Project Overview is a cog. Press it and go to the sub menu. Project Settings. Once here you should go to the Service accounts tab. Here you will get a button that says Generate new private key. Click it. the file that will be generated will have the content that you should paste inside of the “firebase_admin_sdk.json” in the keys folder. This is so that your server side code using the Firebase SDK can authenticate itself in the web API project.
Away we go!
Go to the directory where the project file is located and execute from the command prompt.
dotnet run Opening a browser and going to the URL you have set for the site should bring up the very mundan homepage.
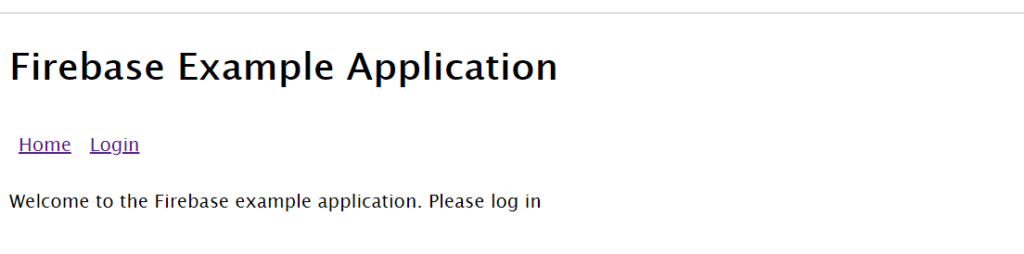
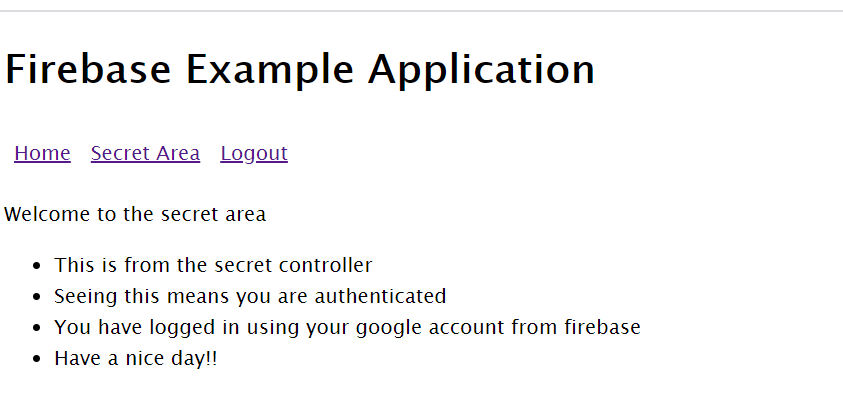
click login and then the click the Login With Google button. This should open a popup that will carry you through the Google authentication process. One of the screens should inform you of your Firebase project’s name and about the information that your project will want to access. Upon successful authentication you will be taken to the home page where it will now show a different message using your display name provided from Google. Also in the menu the link to the secret route should be showing. Click that link and you should see the secret component which will immediately make a call to the secrets endpoint on your API. This should bring back the collection of strings and bind them to the list.
Thoughts
I learned a lot while researching the different parts of this article and I hope I helped you to learn some things too. This tutorial is just a “get started” guide to some useful libraries and services and how to utilize them. It should not be taken as a complete guide to securing a website.
Useful Information
2 thoughts on “Securing a Website Using Firebase, Angular 8, and ASP.Net Core 3.1”
Comments are closed.